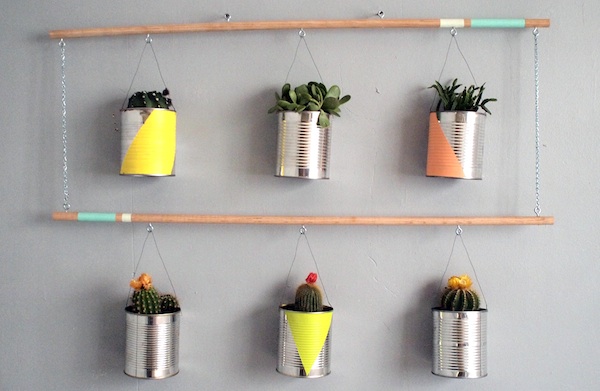
How to Make an Indoor Hanging Garden for Your Apartment
Summer is nearly upon us, and if Pinterest is any indication, it seems everyone is making raised-bed gardens, planting vegetables for future canning projects, or transforming their backyard into a secret garden. And if you live in an apartment, you might find yourself suffering from a major case of lawn-and-garden envy.
But instead of silently seething with jealousy, why not bring the outdoors indoors? To make this hanging indoor garden, you don’t need any outdoor real estate—not even one of those useless Juliet balconies. All you need is a wall that gets some sunlight.
This project is quick, simple, and cheap—I got everything but the plants for under $10. You can choose any plants you’d like, but I opted for a mix of cacti and succulents because they require little watering and upkeep. I have cacti that I neglect like it’s a sport, but if you’re a more advanced gardener, this project would also be great for kitchen herbs.
What You Need:
- Two 36-inch wooden dowels
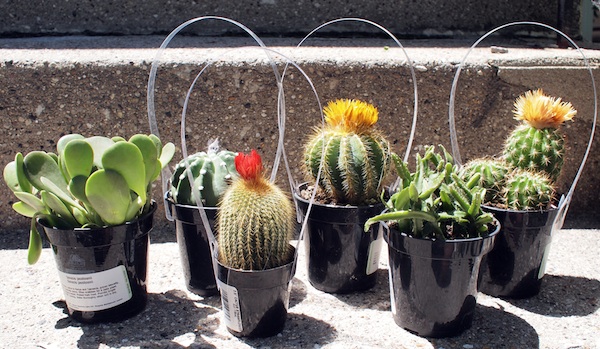
- Six plants of your choice
- Six large tin cans (I saved six 28-ounce cans after making tomato sauce)
- Wire
- Small bag of of potting soil
- Craft paint in different colors
- Two pieces of 1-foot chain (the folks at your local hardware store will cut the chain to your liking)
- 12 eyelets
- Clear tape
- Hammer
- Long nail
- Scrap wood block
- Needle-nose pliers
- Standard pliers
- Drill
- X-Acto knife
Pro tip: Matty K’s Hardware (4874 N. Lincoln Ave.) is a great place to find supplies, and Christy Webber Farm & Garden (2200 W. Grand Ave.) has many options for plants.
What You Do:
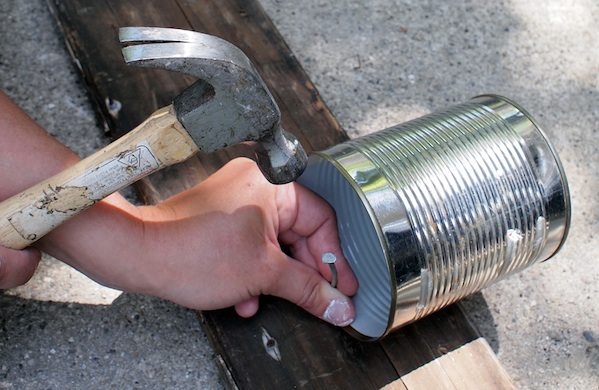
1. Using the hammer, long nail, and wood block, punch holes into the tin cans so you can easily hang them. Place each can on its side on the wood block, and hammer the nail into the edge of the can to create a small hole. Repeat this on the opposite side of the can.
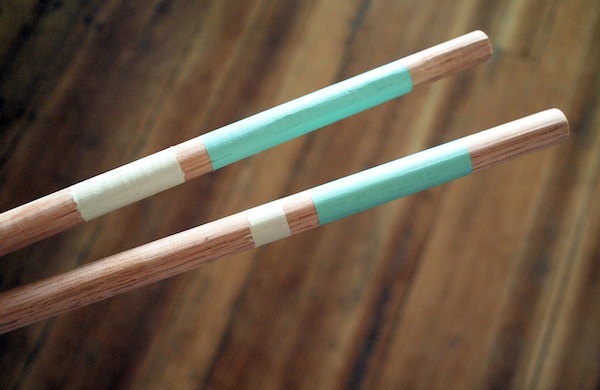
2. Tape off two striped sections on your dowels, and paint them. Once the paint has dried, remove the tape and use an Exacto knife to fix any imperfections.
3. Using the tape, create geometric designs on your cans. For variety, I painted three of them, each with a different color and shape. This is the most time-consuming part of the project, as you will most likely need to give each can three coats of paint.
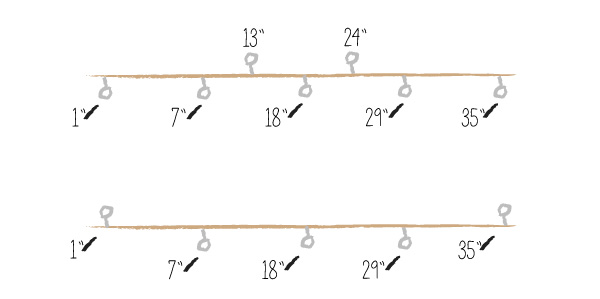
4. Drill small holes all the way through both dowels. To connect the cans to the chain, drill holes at the 1-inch and 35-inch marks; for hanging the plants, drill at the 7-inch, 18-inch, and 29-inch marks. Determine which dowel will be the top one, then drill at the 13-inch and 24-inch marks—that’s where you’ll hang the entire piece on the wall. Finally, screw the eyelets into the dowels using the pliers.
5. Once the cans have dried, add the wire handles. Cut 15-inch-long pieces of wire, and thread the ends through the holes with the needle-nose pliers. Twist the ends so the cans don’t slip off.
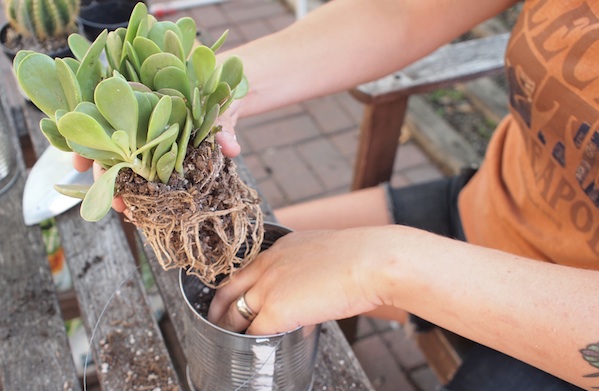
6. Add the plants to the cans. Use extra potting soil as needed so that plants are at the top of the can. Loosen the roots of the plants and then firmly press them into the dirt. Fill in the sides with extra dirt. Give the plants plenty of water to help them recover from the trauma of being moved into a new container.
7. Link the dowels together using the pieces of chain. Both sets of pliers come in handy here for prying the chain links open and then closing them around the eyelets.
8. Hang the hanger on the wall using two very long screws. I suggest reinforcing the whole piece by hammering two long nails directly beneath the ends of the top dowel.
9. Loop the wires around the eyelets to hang the plants, and step back to bask in the glory of photosynthesis.
Note: When you're ready to mount your planter, first hang the dowels, then attach the plants. I tried to mount everything all at once, only to lose my balance and have everything fall to the floor.
Photo: Jessica Duff, Groupon
For more DIY inspiration, check out our festive piñata how-to.

Use cardboard, crepe paper, and glue to make a cactus piñata that’s so cute, your party guests will be forced to beat the living daylights out of it.
Deals in reno

Deals in reno Other Deals in reno